I should probably buy a preassembled battery pack. That’s what any sane person would conclude after researching how ebike batteries are made. So TL;DR you should pay someone qualified to assemble your batteries.
This post is short on purpose and covers the steps one has to take to build a battery for an e-bike.
If you don’t have the patience or don’t want to buy some somewhat affordable (but by no means cheap) equipment, then steer away from this. It takes a lot of tinkering to get to the point where you will feel safe welding lithium cells.
WARNING: While the actual welding is not an dextrous act, you are still working with a shit-ton of very, very angry pixies. This means that you must check every weld at least twice: first visually then physically. Do not rush it! If your cells start burning you can’t extinguish them so be sure to work on a fire-proof surface. Build at your own risk and do thorough research on safety procedures before attempting to even buy unprotected lithium cells.
Preparing the build
In the previous post we discussed how to choose a lithium cell for your pack. I settled on Panasonic NCR18650BD 3100mAh 10A, which have fine characteristics for a pedal-assisted e/bike. You can’t have the cells just dangling off the bike so you need a case. I opted for a Hailong 18650 with room for my 50 cells in a 10s5p configuration. The case came with a mounting bracket, 1 meter of pre-cut nickel and a nice diagram describing how to cut the nickel for 10s5p.
The BMS is from LiitoKala, but I can’t seem to find the original posting. You can get a similar one from many brands. It’s a balancing 10-cell BMS which has worked hassle-free for two years. These are fairly cheap on the order of 20 euros.
Besides the batteries and a spot-welder you will need some basic tools and consumables:
- Multimeter
- Wire cutters for the nickel (or a pair of scissors you don’t need)
- Soldering iron and solder
- Kapton tape
- Silicone wire, 10-14 AWG
- Shrink wrap for the battery pack
- Gloves and safety goggles
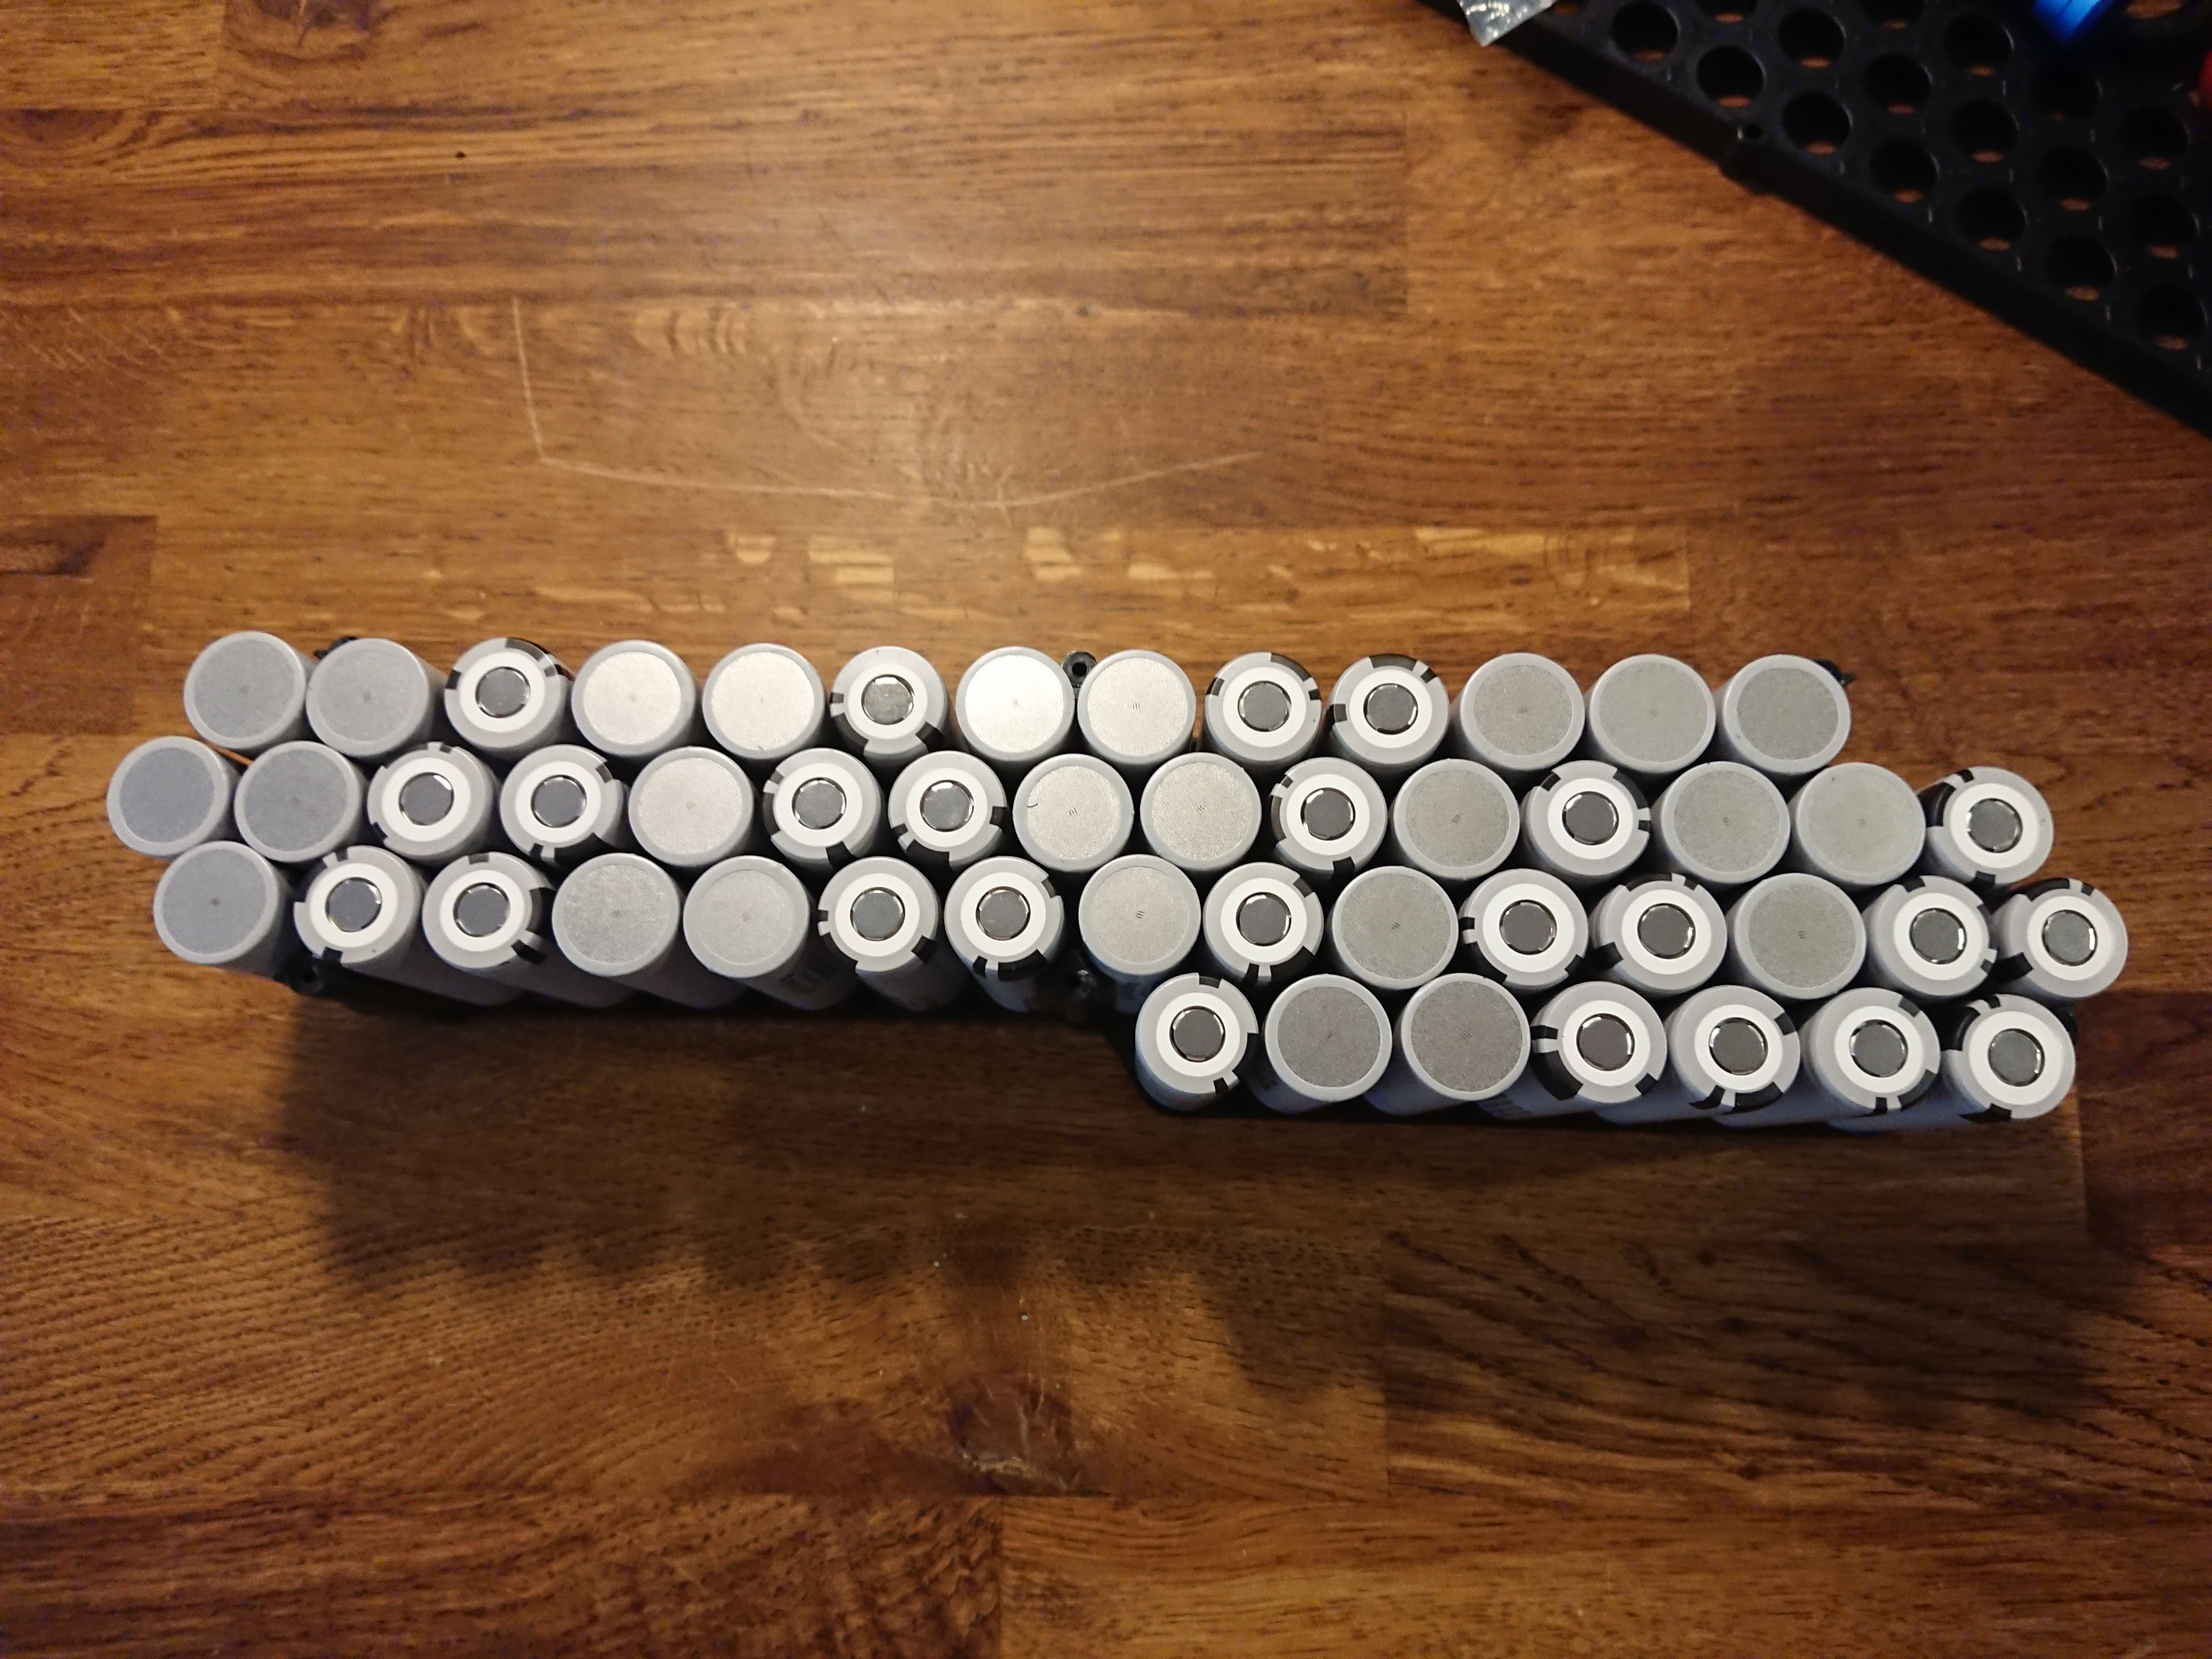
Once you have that in place, prepare your batteries. With the case you usually get some form of battery holder. Insert the cells into the holder according to your chosen configuration.
Preparing the cells
Gather all your cells and plan how you will connect the nickel. The pre-cut nickel really helps here since it really speeds up the process. Before you handle any cells remove or cover in electrical tape any and all conductive jewelry. Necklaces, bracelets and rings are a short waiting to happen.
Using the schematic from your Hailong case supplier (or your own design) you can now cut the nickel to size:

Now CHECK YOUR SCHEMATIC AGAIN because 50 cells pack a lot of energy, and if you feel confident in your intended schematic, carry on to the next step.
Spot welding batteries 101
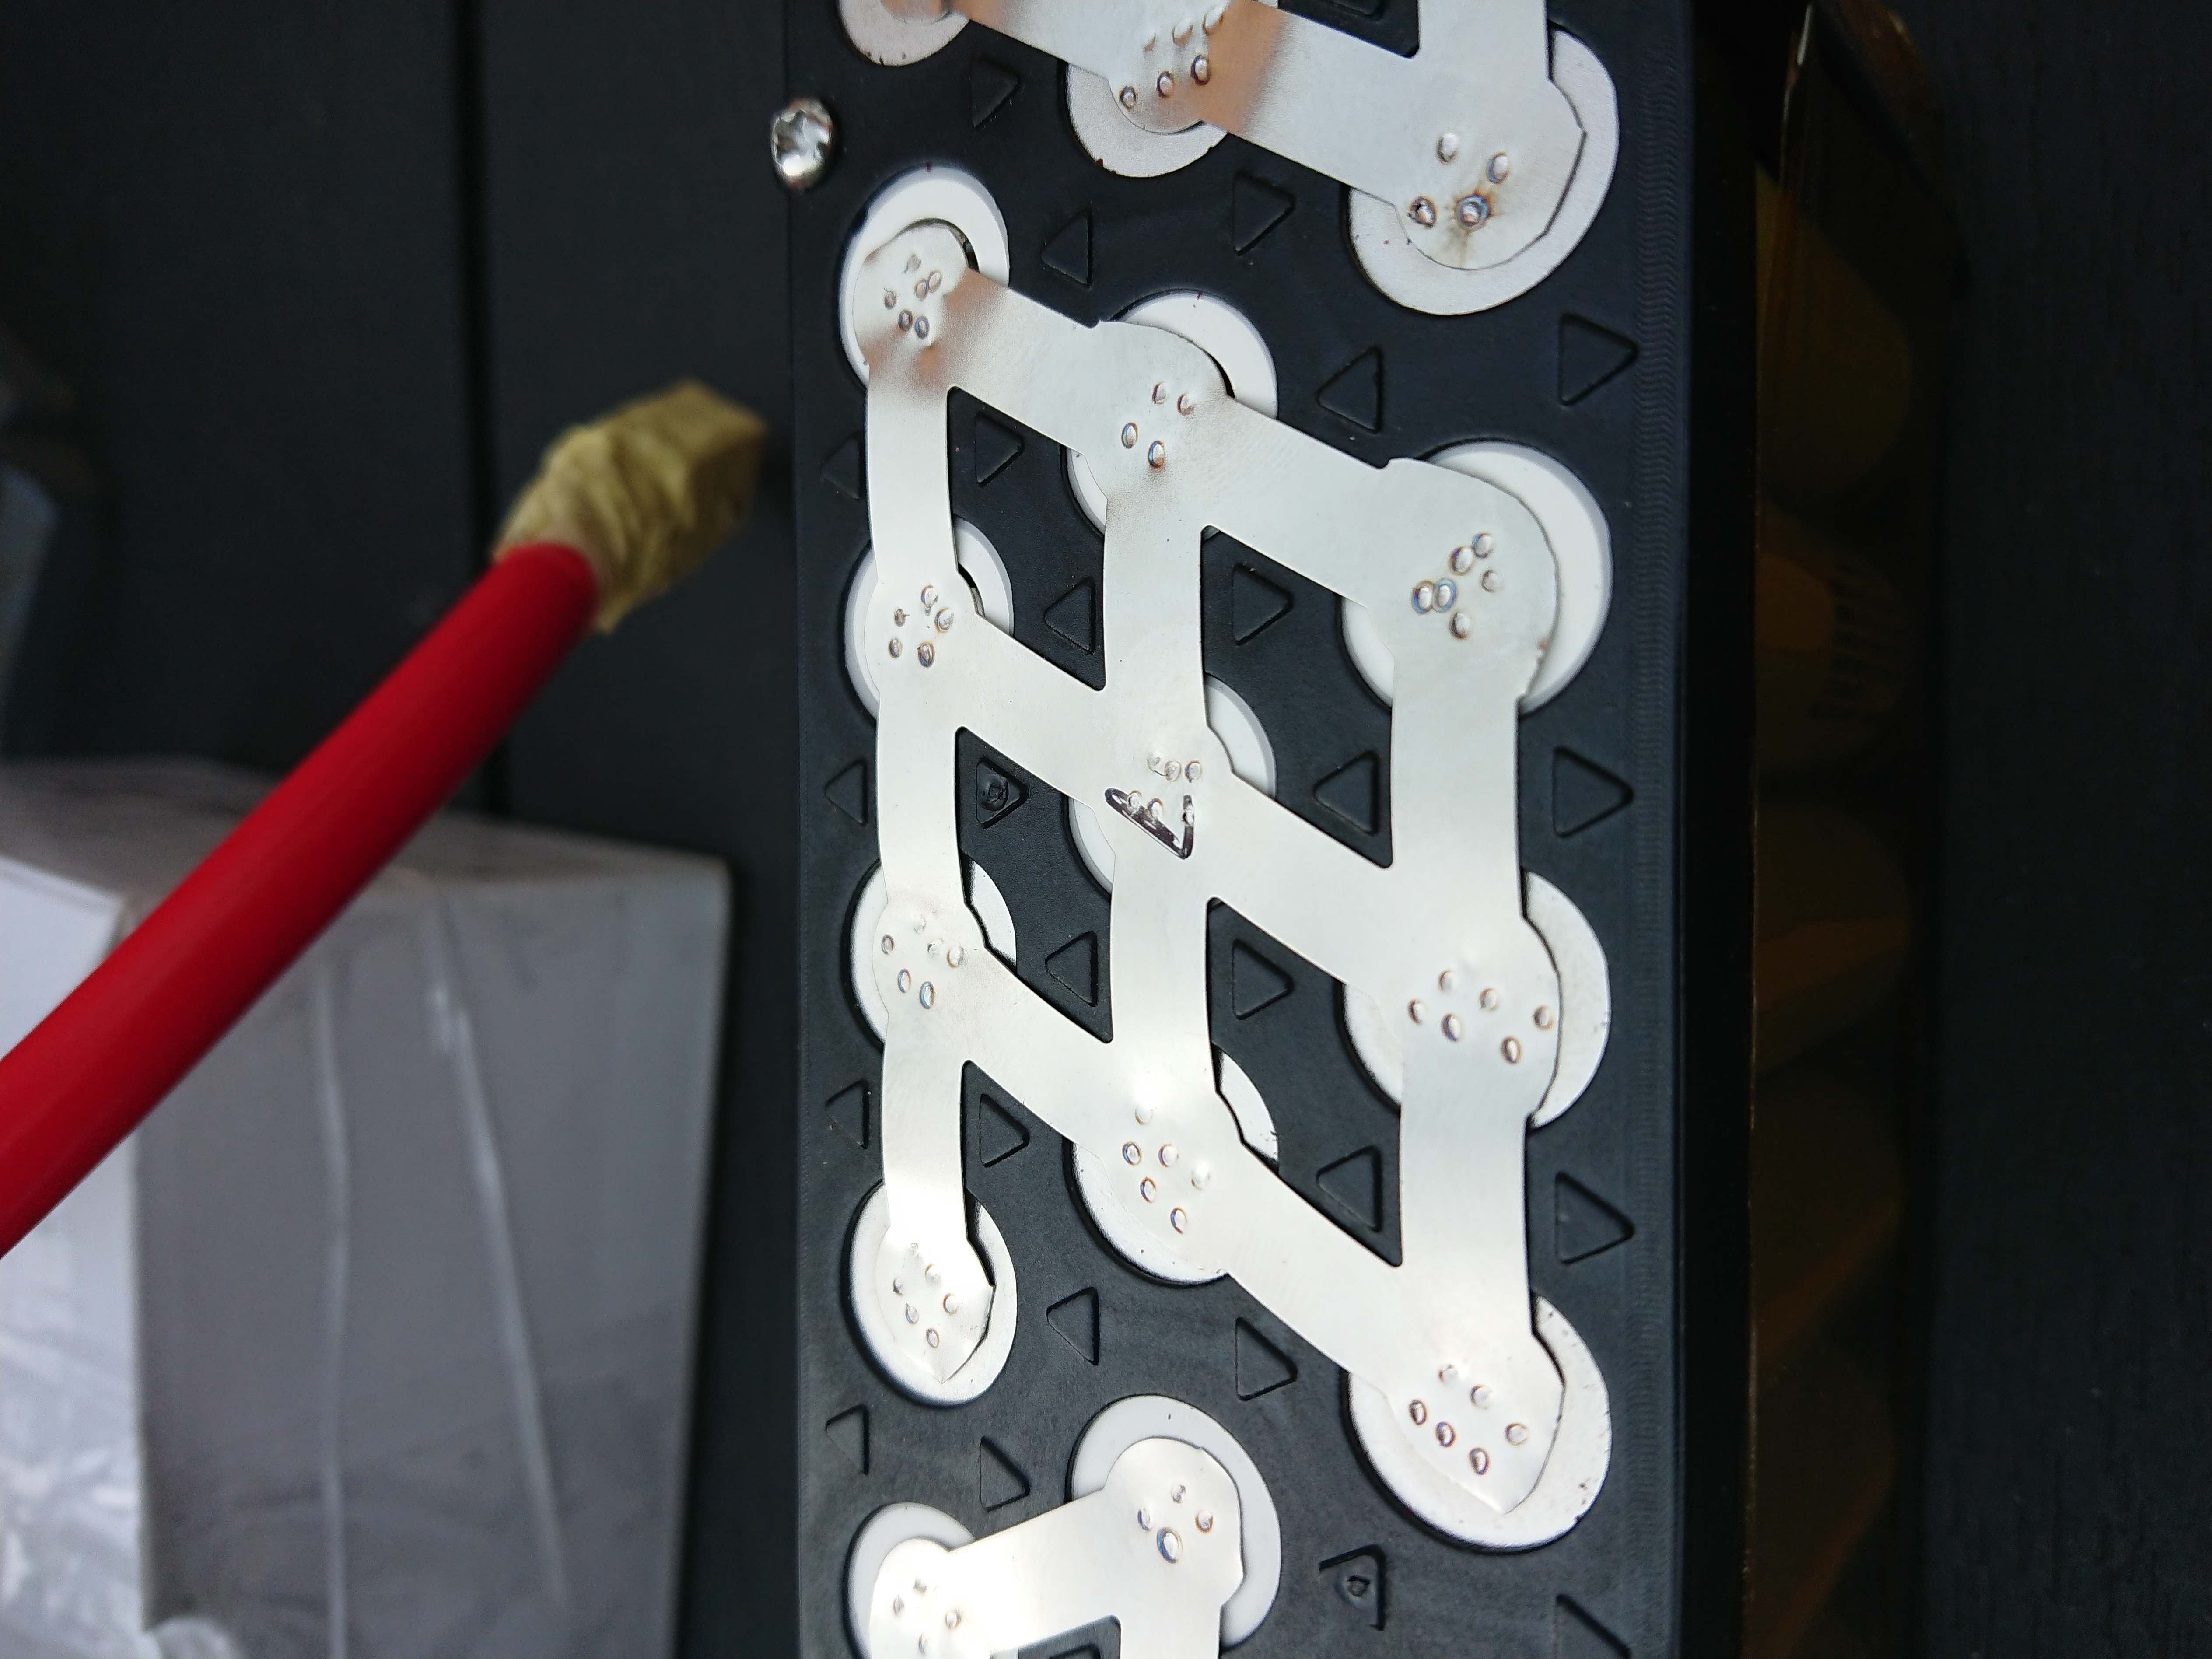
Check every two terminals you intend to weld with a multimeter before making the connection. Then check it again. Once you are absolutely certain that you are not shorting anything, place the nickel strip on the batteries, hold it in place with your fingers or with some small magnets.
Once you’ve welded a group of cells tape it up with kapton or electrical tape. A good weld looks like this:
Very carefully continue welding until you run out of cells to weld. Once welded attach the balancing wires to the pack. The balance wires attach to each of the cell groups in the series. After this step my battery looked like this:

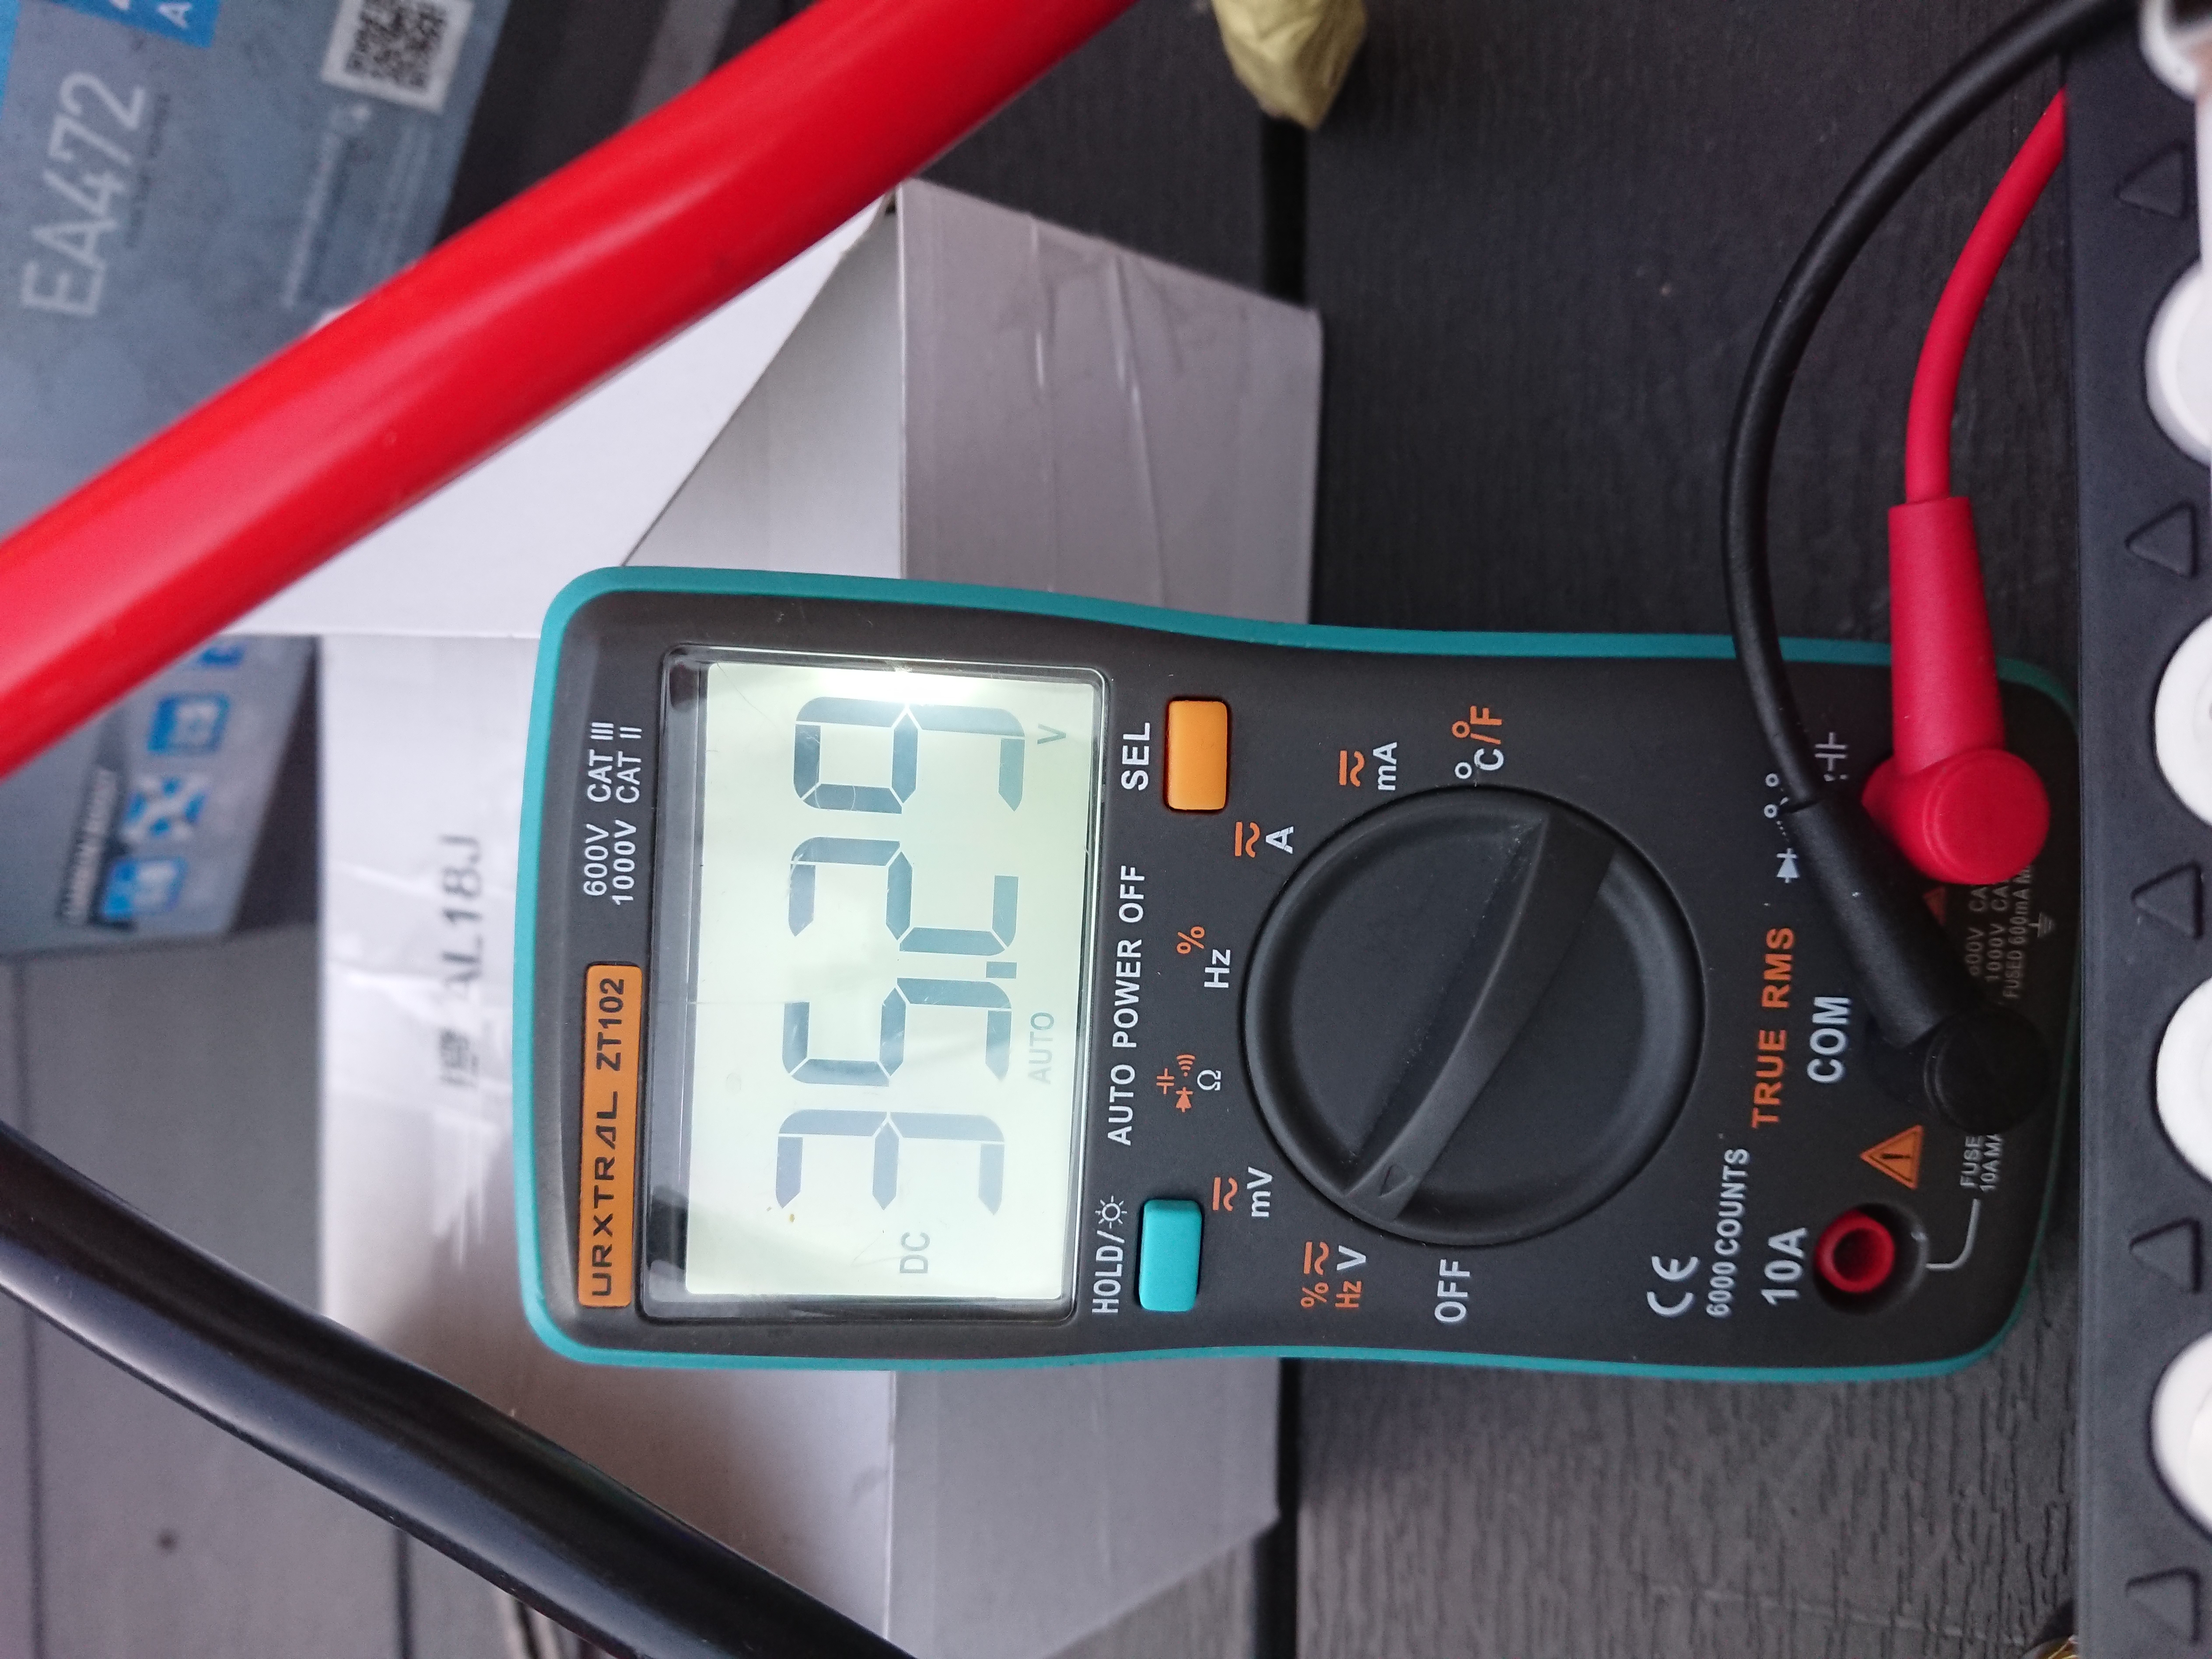
And if you measure the voltage across the entire pack it should read around 36v:
Now check all your welds again, attach the BMS and stick the cells into your battery case.
The aftermath
The battery was finished May 2021 and has worked flawlessly for over two years with a daily commute of 17km in Danish weather.
The cells perform extremely well when it’s above around 10 degrees C outside and have a notably poorer performance when it’s cold especially when it’s below freezing. The capacity takes a hit too, but I can still make two days commute in cold and windy conditions without running it dry. During the summer it’s around 3-4 days, but I usually charge after 2.
These issues are inherent to the types of cells I chose. Larger electric vehicles mostly get around this by having thousands to tens of thousands of cells, but when you only have 50 the effects are quite obvious.
The build itself was fairly straightforward and only took a couple of hours but I had had months of experimenting and scaling up before that. After a few months I fired up the ghetto spot welder again for a repair job, but it sadly died in the process. I shortly thereafter bought a k-Weld from keenlab.de and have never looked back.
Thanks for reading if you’ve made it this far.
/J